For most of our customers we find that they consistently sell very similar or the same items together. It helps in this case to create a pricing bundle.
Bundles might be for something as simple as the installation of a server, or revision of managed services to a customer. In all of these cases, you would have lots of associated line items all coming together on a consistent basis. Instead of having to recreate those line items every single time you do pricing, you can create a pricing bundle which allows you to recreate the pricing simply by clicking a button.
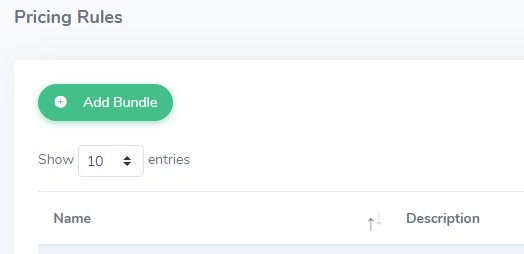
This can be created under Pricing/Pricing Rules in your top menu.
1. Add a Bundle
Click on the green Add Bundle button.
Give the bundle a name and a description.
Choose the Optional Type, which is where you can choose how your customer will interact with the pricing. For example you want them to see three options but choose one, in which case you would set this as "must choose one" before they can sign off the document. The options are:
- None
- Can choose one
- Must choose one
- Can choose many
If you do not have any options for the customer, just choose "None".
You can set the bundle for a specific customer if you wish.
You can make the bundle static, dynamic or rental factor. Dynamic means the pricing is kept up to date in Autotask, and Static means the pricing is kept up to date by ZenContract. If you want to know more about Rental Factor, please contact a sales representative.
Click the green Save button to create your bundle.
2. Create Pricing Sections
Once you have created the bundle, click on the pencil icon on the right to edit the bundle.
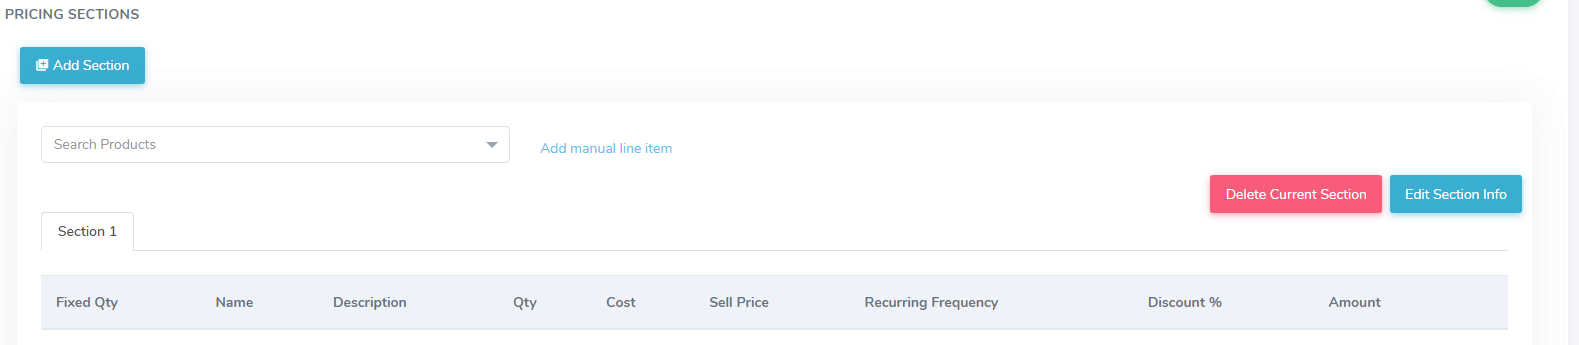
Scroll down to the Pricing Sections area. This is where you can create as many sections and line items as you like for this bundle.
Click on the blue Add Section button.

You will get a pop-up where you can add your section.
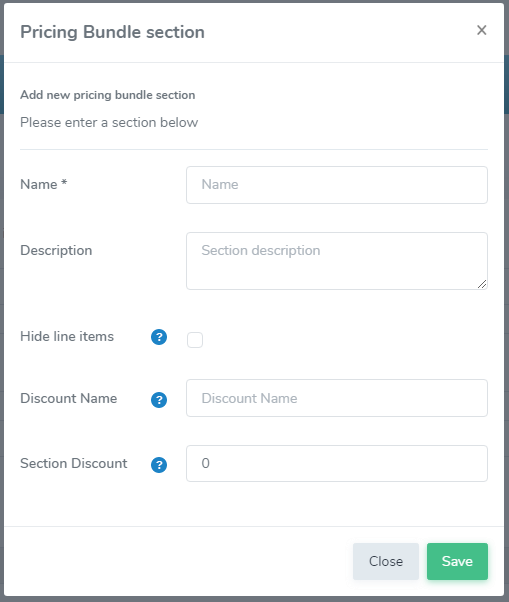
Give your section a name and a description.
You can also choose to hide the line items if you wish, for example if you were creating a gold or premium bundle, or if you have line items that won't make sense for a customer to see.
You can set a discount name and percentage here also.
Click the green Save button to save your section.
3. Create Line Items
Now you have your section, or sections, you can add line items to those section/s.
If your pricing is static, click on the blue Add manual line item link to create a new line item for the section.

Enter in the information for that line item. The line items save automatically as you click into each field, so there is no save button.
If your pricing is dynamic, use the "Search Products" area to search for the products you want to add to your bundle. Click on the product you want, and it will automatically add to the section.
Pay attention to the fixed quantity box on the left hand side.
When you are happy with the bundle, scroll up and click the green Save button.
Watch the video to see how this is created, and an example of how you can set up this feature.